# Overview
Welcome to the official Homescriptone Solutions Products Documentation.
# Ultimate Automator(Archived)
# Installation
# A – Requirements
Ultimate Automator requires :
* PHP 7.0 or latest
* WordPress 5.0 or latest
# B – Installation Process
* First, extract the archive in a folder of your choice and let’s start the installation.
* Go to your WordPress Admin Panel and click on **Plugins > Add New** to access the plugins installation screen.
* Then click on the **upload** l ink to access the plugin upload page.
* Click on the Choose file button and select the plugin installable zip archive named **doko-box-builder.zip** in the folder extracted in the first step.
* Click on the **Install Now** button to run the installation.
* Once the plugin is successfully installed, please click on the **Activate Plugin** link to activate the plugin.
# How to create a WhatsApp app on Facebook Developers?
To use the WordPress plugin, you may need to create a Facebook application and configure it so that the plugin automatically sends the right reply to the message sent.
Go to the Facebook Developers website [here](https://developers.facebook.com) :
facebook developers homepage
You may need to log in to your account. Once logged in, you may need to create a new application :
facebook developer homepage empty
Once you've clicked on the "**Create an application**" option, a modal window appears and you can choose the option below.
Simply select the Business option to be able to use the WhatsApp options:
facebook developer new app modal
Once "**Business**" is selected, fill in the fields with the name of your application, the application contact email, and the business account you wish to associate with your WhatsApp application:
facebook developer pre submit create app
Once filled, click on the option with the name create app, once done your page will reload.
You will need to click the setup options for '**Webhooks**' and ‘**WhatsApp**’ displayed on the page, once done you will see the options showed below like this :
facebook app products created
In order to go forward, you may need to configure the webhooks for the WhatsApp messaging.
Click on **Webhooks** in the left-hand sidebar, then click on the user selection options, we'll need to choose **Whatsapp Business Account** as this is the one that will allow us to set up the automatic sending of messages from our website as an autoresponder.
webhook screen
Once done, a modal will show into this you will see two options that is really important for us : \
facebook webhooks option
* **Callback URL:** A URL where Facebook will send the message sent by a customer to your app.\
To find it, you just need to head to your WordPress site with the plugin activated and copy the webhook url find on the plugin settings page :
* **Verify token:** A private token, Facebook will use to verify if your connection to the app is trustworthy or not.\
You can define it under the plugin page too once you have put it on the Facebook app page.
Once filled, you will have to verify, if the verification is successful, the token will be saved automatically to your account. At the page refresh, the following options will be displayed on your page :
facebook webhooks
Here is the webhooks options explanation :
| Field Name | Description |
| --------------------------------- | ------------------------------------------------------------------------------------------------------------------------------------------------------------------------------------------------------------------------------------------------------------------------------------------------------------------------------------------------ |
| `account_alerts` | Notifies you of decisions related to Official Business Account status or a denial of messaging limit increases. Note that these are independent of [developer notifications](https://developers.facebook.com/docs/development/create-an-app/developer-settings#notification-settings). |
| `account_review_update` | A notification is sent to you when a WhatsApp Business Account has been reviewed. |
| `account_update` | A notification is sent to you when a change to your WhatsApp Business Account has occurred. This change can include phone number update, a [policy violation](https://developers.facebook.com/docs/whatsapp/overview/policy-enforcement), a WhatsApp Business Account has been banned and more. |
| `business_capability_update` | Notifies you of changes to a business's capabilities. This can include changes to the maximum number of business phone numbers your WhatsApp Business Account can have, or a change to the [messaging limit](https://developers.facebook.com/docs/whatsapp/messaging-limits) for all of your WhatsApp Business Account's business phone numbers. |
| `message_template_quality_update` | A notification is sent to you when a message template's quality rating changes. |
| `message_template_status_update` | A notification is sent to you when the message template has been approved or rejected, or if it has been disabled. |
| `messages` | A notification is sent to you when your business has received a message from a customer, when you send a message to a customer, when a message is delivered to a customer, and when your message is read by a customer. |
| `phone_number_name_update` | A notification is sent to you when the name associated with a phone number has been approved or rejected. |
| `phone_number_quality_update` | A notification is sent to you when the quality-related status for a phone number has an update. |
| `security` |
A notification is sent to you when:
you request to disable two-step verification code
the two-step verification code is disabled
the two-step verification code is updated
|
| `template_category_update` | A notification is sent to you when a template's category changes, indicating the template's previous and new category. |
Then subscribe to the webhooks, you want to receive notifications from.
At the end, go to the WhatsApp Configuration menu, configure the webhook the same way we configure the other webhook option. \
Add your phone number to your app too, this phone number will be used to do any communication.
facebook configuration screen
Once everything done, you will see under **WhatsApp > API Setup** the following details that are very important for the configuration we'll do into the plugin :
* **Phone number ID :** Personal Unique phone number you can use in order to send WhatsApp messages through Cloud API, Business Manager API and more,
* WhatsApp Business Account ID : The WhatsApp account ID lets Facebook know which account your number is linked to
facebook personal data
# How to create a permanent token for Whatsapp communication?
Access your Facebook business manager [here](https://business.facebook.com/), go to the System users tab :
Once on the system user screen, create a new system user. A modal will be showned, you will have to enter your system user name, the role for this system user ( i recommend you to choose Admin )
Once done, we'll need to add assets to the system user we created. Those assets will assign to the system user the permission to send whatsapp message and do custom events.
You'll need to select the permissions that matter to you.
Once done, you'll get a similar display on your system user screen.
Then, in order to send automatic messages from your website, we will need a permanent token so Facebook easily validates any request sent using our WhatsApp phone number.
Due to the app, I created into the Facebook app, the WhatsApp permissions are the ones relevant for our current case scenario.
If you are sure that each 60 days, you can reset your permanent token, then his the 60 days otherwise choose the option Never.
Once done a permanent token will be generated by the system, this one will help us to send WhatsApp messages without restrictions and anytime you want.
# How to connect your website to your Facebook Whatsapp app ?
Go to the plugin settings, and make sure to follow the instructions mentioned here :
{% content-ref url="/pages/jTTgAYZq4RnUSxUQJp4o" %}
[How to create a WhatsApp app on Facebook Developers?](/wordpress-plugins/ultimate-automator-archived/how-to-create-a-whatsapp-app-on-facebook-developers)
{% endcontent-ref %}
{% content-ref url="/pages/hgmjzwXOg0kU3rhbYoG4" %}
[How to create a permanent token for Whatsapp communication?](/wordpress-plugins/ultimate-automator-archived/how-to-create-a-permanent-token-for-whatsapp-communication)
{% endcontent-ref %}
Once done, we'll use the different values provided to setup the connection between your website and Facebook :
facebook
* **API Version:** Facebook API version to use in order to send Whatsapp messages, by default it's put to v16.0
* **Phone Number ID:** Facebook App Phone Number generated [here](/wordpress-plugins/ultimate-automator-archived/how-to-create-a-whatsapp-app-on-facebook-developers)
* **WhatsApp Business Number Account ID:** Facebook Whatsapp Business Number Account ID generated [here](/wordpress-plugins/ultimate-automator-archived/how-to-create-a-whatsapp-app-on-facebook-developers)
* **Access Token:** Permanent token for the Facebook app, find how to configure it [here](/wordpress-plugins/ultimate-automator-archived/how-to-create-a-permanent-token-for-whatsapp-communication)
* **Auth Verify Token:** Provide the token you will use for the verification part of the webhook, read more about it [here](/wordpress-plugins/ultimate-automator-archived/how-to-create-a-permanent-token-for-whatsapp-communication)
# How to track all incoming messages on your Whatsapp app? ( beta )
Go to the submenu **Request Logs,** you will see listed into developer language the different requests done to your phone number :
# How to get details of customers writing to my Whatsapp app?
Go to the submenu **Customers**, you will see listed names, phone numbers of customers interacting with your Whatsapp :
customer details
# How to send automated Whatsapp messages ?
Go to the submenu page **Messages** and create a new message :
Give a title to your message and fill the following fields.
* **Message Template Name:** select the message template that must be used for this message sending,
* **Message Allowed Terms:** Indicates the authorized terms that must be used to initiate this message sending.
Once done, just save and enjoy the automation on your website.
### **Use cases**
* A customer sent you a message to the configured Whatsapp number, and says hello, the message configured on top says if he finds the word hello in the message he just needs to send the associated message template. Once done, the message sender will just receive a message on your behalf.
# Doko Bundle Builder : The Ultimate dynamic bundle builder for WooCommerce
**Doko Builde**r is a very easy-to-use plugin for WooCommerce. You just need to install it, and it’s ready to work.
Whether you want to launch bundles for Christmas, Easter or special period, use **Doko Builder** and create high performing product bundles and see your revenue soar. Even better, you can position it as a service to let your customers build custom gifts.
#### Create a bundle in no time
1- Create each step of your builder. This can be a single or multiple product selection steps, to collect any other information you need for the order.
2- Add a name and description to your steps, to help the customer understand what's required.
#### **Control the look & feel of your bundles**
While other product bundle apps limit the number of bundles, products or steps, **Doko Builder** is limitless! **Doko Builder** enables you to control & customize your bundles the way you want.
1- Be it fixed-price bundles, automatic & tiered discounts, or custom kits, you can do it with **Doko Builder**.
2- Unlike other apps, you can allow customers to filter products by collections or product title in each step.
3- The app automatically syncs with your store’s product inventory stock levels and updates your product details from the moment you get started.
4- The app will work with subscription plugins for recurring orders!
***
From here you can follow the instructions below to configure the plugin if you are new to the plugin.
{% content-ref url="/pages/TiPbccvbnDREJRGC8QNp" %}
[Configuration](/wordpress-plugins/doko-bundle-builder-the-ultimate-dynamic-bundle-builder-for-woocommerce/configuration)
{% endcontent-ref %}
{% content-ref url="/pages/7VDv1VHDaXqcc32I9RQC" %}
[FAQ](/wordpress-plugins/doko-bundle-builder-the-ultimate-dynamic-bundle-builder-for-woocommerce/faq)
{% endcontent-ref %}
If you are a developer you will find useful information here:
{% content-ref url="/pages/Kh5r47QSyH9Ajihjw6LG" %}
[Hooks for developers](/wordpress-plugins/doko-bundle-builder-the-ultimate-dynamic-bundle-builder-for-woocommerce/hooks-for-developers)
{% endcontent-ref %}
***
To take it further, we have a demo website that shows creative ways the plugin works:
{% embed url="" %}
For interactive use of the plugin, there is also a video playlist showing the plugin in action:
{% embed url="" %}
***
If you still have any questions, please leave us a message or say hello in our live chat:
{% embed url="" %}
# Installation
# A – Requirements
Doko Builder **WooCommerce** requires :
* **PHP** 8.0 or latest
* **WordPress** version 6.0 or latest
* **WooCommerce** version 8.0 or latest
# B – Installation Process
Doko plugin installation
1. First, extract the archive in a folder of your choice and let’s start the installation.
2. Go to your WordPress Admin Panel and click on **Plugins > Add New** to access the plugins installation screen.
3. Then click on the **upload** l ink to access the plugin upload page.
4. Click on the Choose file button and select the plugin installable zip archive named **doko-box-builder.zip** in the folder extracted in the first step.
5. Click on the **Install Now** button to run the installation.
6. Once the plugin is successfully installed, please click on the **Activate Plugin** link to activate the plugin.
# Configuration
In order to get started with the plugin, we will see how to configure it.
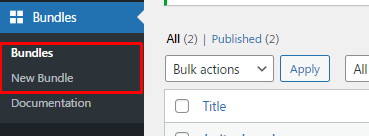
The plugin provides the following menu :
* **Bundles :** Find the different bundles you have created ,
* **New Bundle :** Create your bundle easily
# How to create a bundle of WooCommerce products with Doko Builder ?
In order to create a new bundle, access your WordPress dashboard and head to the **Bundles** menu.
bundle page
Then clicks **New Bundle** and you will see this page :
new bundle page
The page shows many fields that must be filled in order to see your dynamic bundle page.
* **Bundle Name :** Give a name to the bundle you're creating, this name will only be seen by you.
**A- First screen setup :** These fields represent the configuration of the first step into your dynamic bundle.\
\
This is a screenshot of the current step :
first step
The first section provides few customizable fields that can be used :
* **Title :** Define a description for the first step screen
* **Display according to :** Choose whether to display the products individually or by category in the first step.\
Based on your choice, the fields **Product to display** or **Category to display** will give you the ability to define products that the step depends on
* **Enable auto-redirect to next page :** If any product on the first step is picked and the option is defined to **Yes,** it redirects to the next step immediately, otherwise the customer choose to go to the next step himself.
* **No products message :** If no product is selected in the first step and the customer attempts to proceed to the next step, a message is displayed to prevent the customer from proceeding to the next step.
**B- Bundles Screens :** This section provides options to create additional steps page. Similar to the first step section, it includes ways to change the look of the new step created.
These are screenshots of the various types of steps :
bundle products
bundle cart contents
The bundle screens provide a way to create as many screens you would like to have after the first step.\
* **Screen name :** Define a name to easily identify this step
* **Choose Bundle Screen disposition :** Choose the disposition in you would like to see this step, whether it is bundle products disposition, bundle cart content disposition or bundle card page mode.
* **Show Products on this screen based on :** Choose whether to display the products individually or by category in the first step.\
Based on your choice, the fields **Product to display** or **Category to display** will give you the ability to define products that the step depends on.
**C- Bundles Screens Options :** This section take care of other options relevant to the bundle page.
* **Display the box contents into the cart and checkout page:** Display bundled products together in the cart and checkout page.
* **Title to use on the latest step page :** Provide a title to be used on the latest step page, the default one is ***Building your bundle box***
* **Description to use on the latest step page after the last step title section :** \
Provide a description to be used after the default title on the last step page.\
The default one is : ***Please wait a moment while we prepare your custom bundle box***
Once you have followed the steps mentioned, make sure to publish or save your bundle.
# How to display your bundle on your store ?
In order to follow this section, you may need to follow this tutorial before to go ahead :
{% content-ref url="/pages/t8bQBiqyzWh7sPlSWP77" %}
[How to create a bundle of WooCommerce products with Doko Builder ?](/wordpress-plugins/doko-bundle-builder-the-ultimate-dynamic-bundle-builder-for-woocommerce/configuration/how-to-create-a-bundle-of-woocommerce-products-with-doko-builder)
{% endcontent-ref %}
Once you created your bundle, a short code will be created for your bundle. Copy this short code, create a new page and add the short code to your page.
You may need to make sure to save the page created, so by accessing the page on your website frontend, it displays correctly.
Once all the steps has been taken, your customers should be able to build their bundle the way they want, and this will reduce your anxiety about customer cancelling orders just because a product is out of stock.
We have various demo on our website we invite you to test to see in action our plugin :
* **Bundle Wine Demo :**
* **Wedding Bundle Demo :**
* **Birthday Gift Box Demo :**
If you have some questions and inquiries, contact us here :
# How to customize styles on bundle page ? ( PRO )
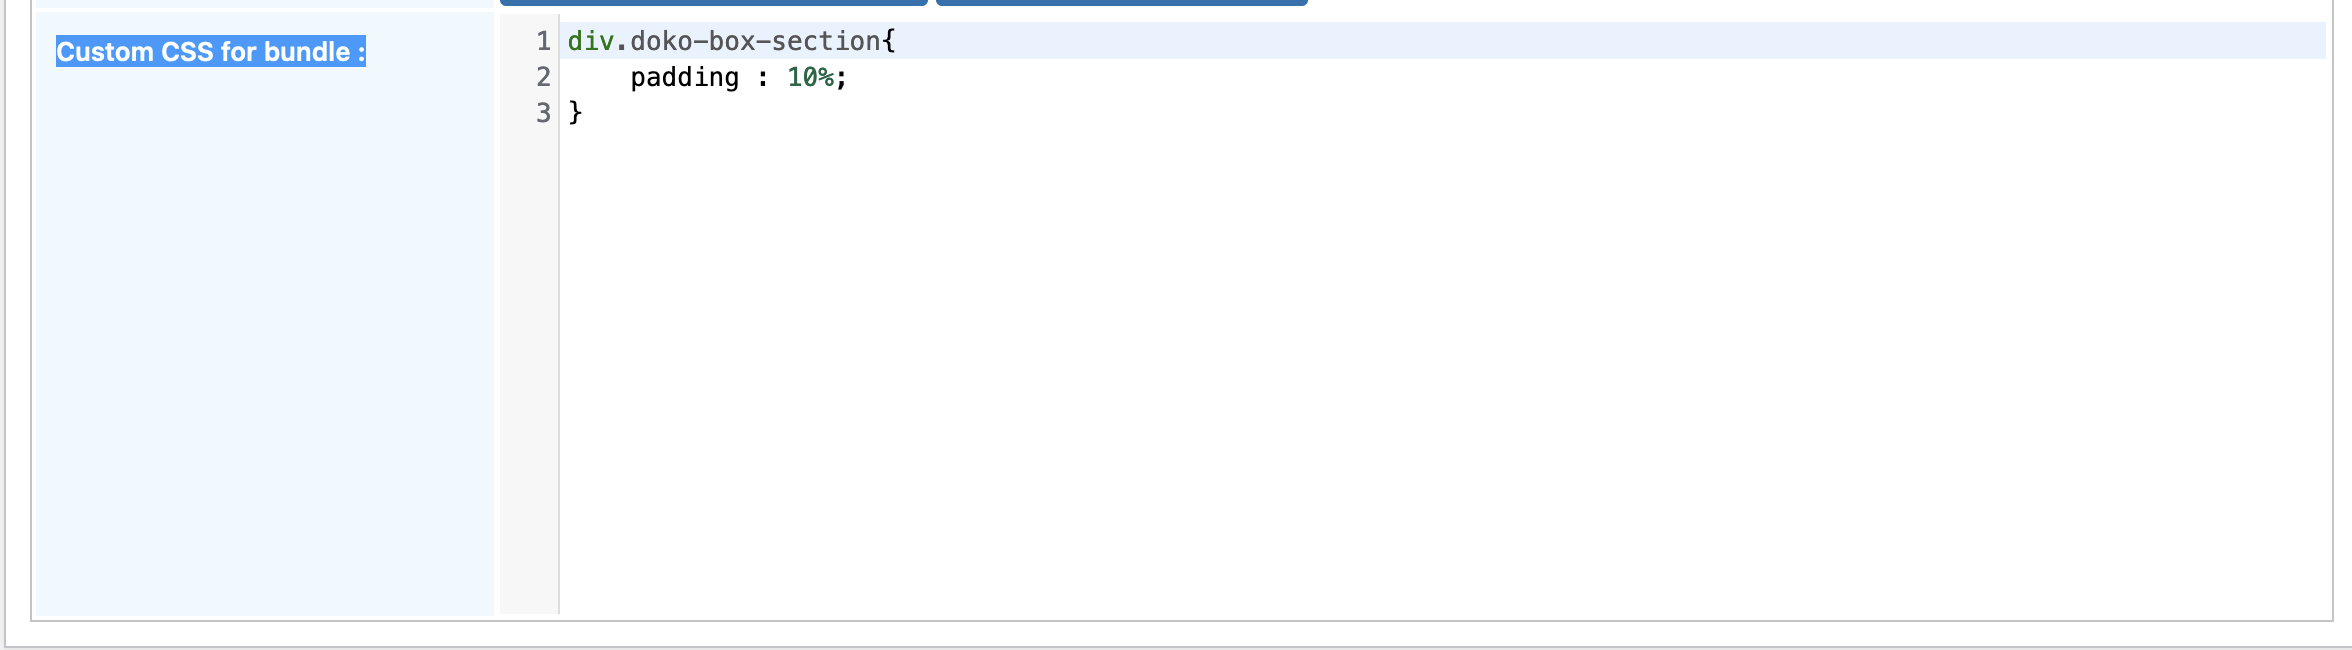
To add custom styles for your bundle page, go to the admin section on the page where the bundle is created. There is an option named "***Custom CSS for Bundle.***" This option allows you to include custom styles for the bundle page.
\
Once edited or finished adding configurations for your bundle page, just save it and publish it and you're ready to go.
# How to define a custom background for your bundle page ? ( PRO )
Just imagine you're running sales for Halloween, Easter, Christmas, or other important celebrations, and you want your customers to feel the spirit of the celebration when they visit your bundle page.
Let us introduce you to an option that allows you to include background elements, such as a picture (PNG, JPEG, GIF, or other image formats), which can influence customers' decisions and help you increase sales for your store.
You can find this option on the bundle creation page, it is named '***Background image***' :\
# How to configure dynamic rules for each steps in Doko Builder (PRO) ?
In order to create a new bundle, access your WordPress dashboard and head to the **Bundle Rules** menu.
submenu doko bundle rule
Then clicks **New Bundle Rule** and you will be redirected to this this page :
new bundle rule creation
The page shows many fields that must be filled so the rules be applied smoothly :
* **Bundle Rule Name :** Give the bundle rule you're creating a name that only you will see.
* **Bundle where this rule will apply :** Specify the bundle to which this rule applies, you can only apply it to one bundle at a time.
Once you have selected the bundle, click **Add Rule** to specify the rules you want for this bundle.
define-rule
Once the rule is added, customize-it the way you would like by filling the various field or options present there :
* **Step Name :** Choose the step where this rule must be applied,
* **Rules :** Specify the trigger of the rules, you can say if a specific product or a group of products are the ones that trigger these rules.
rules-for-bundle-rules
* **Action :** Specify the action to execute once the rule has been triggered. The available action are listed below :
* **Limit product in next step :** This restrict the numbers of products users will be able to add to their bundle in the next step,
* **Limit product in current step :** This restrict the numbers of products users will be able to add to their bundle in the current step,
* **Limit amount in current step :** This restrict the product amount users should be able to add to their bundle in the current step,
* **Limit amount in next step :** This restrict the product amount users should be able to add to their bundle in the next step,
* **Go to step :** This redirect the user to the step defined if the rule is triggered.
Find below, a tutorial video showing how to configure the dynamic rules for each steps in Doko Builder plugin :
{% embed url="" %}
# How to allow customer to select the product quantity on each step ? (PRO)
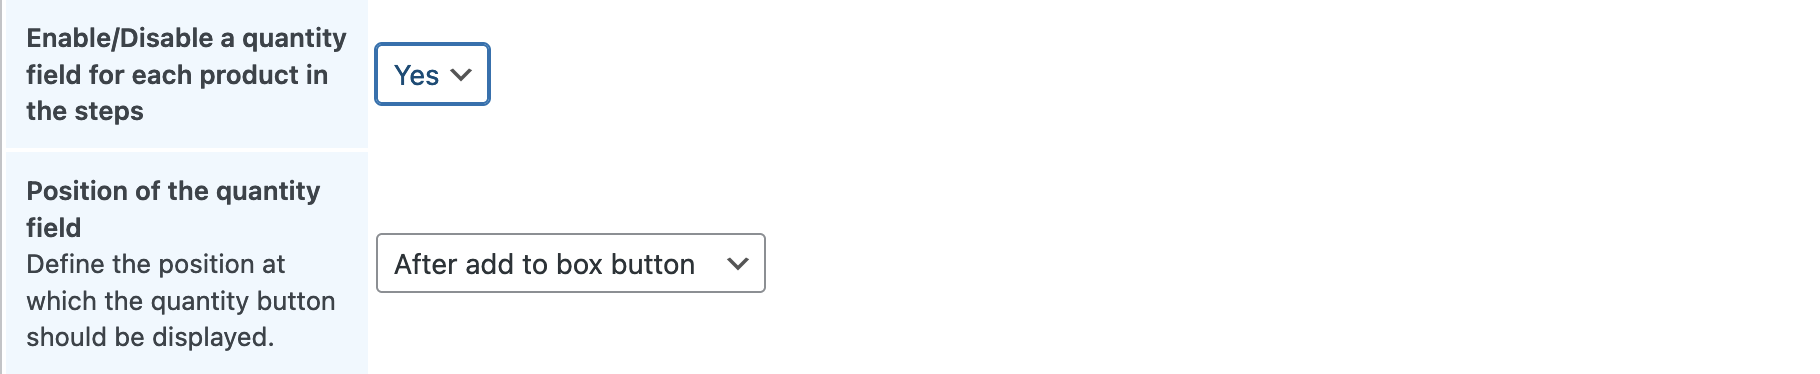
To allow your customer to specify the quantity or products they want at each step, there is this option available on the bundle creation screen.
This option gives you the ability to specify where the quantity field is displayed in the bundle builder screen, based on this your customer can choose whatever they want for a product in the bundle step and hourra, which means more sales for you !
# How to display hidden products in my bundle page ? ( PRO )
Do you have a set of products where you defined the visiibilty hidden and would like it to be displayed in your bundle page ?
if you're in this case, find a mecansim allowing you to display hidden products with ease on your bundle page.
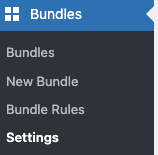
To use this feature, make sure to use the PRO version of the plugin, then go to **Bundles > Settings** section **:**
bundle settings
You will see this option in your settings page :
If you define the option to ***Yes,*** the hidden products would be displayed in the bundle page you created, otherwise it would hide it.
# How to display variable product as a single product instead of separate ? ( PRO )
By default, Doko Builder plugin separate variations from a variable product as individual product.
On some store, this is not something possible due to some variable product configurations.
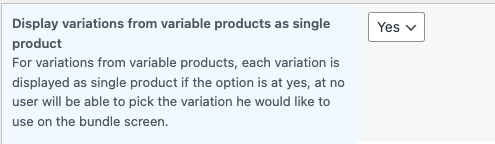
In order to be able to see the variable product as a single product, their is a option into the settings page of the plugin.
To do so, go to **Bundles > Settings :**
bundle settings
It will redirect on a page where you can customise this option like you want :
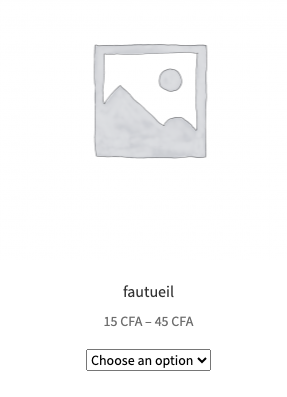
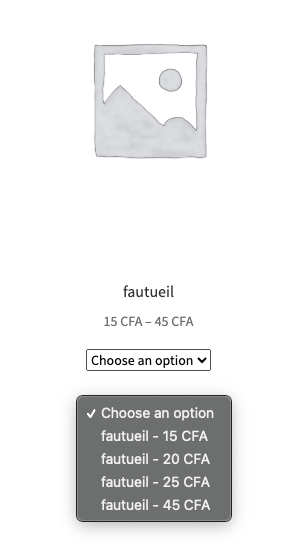
If you define the option to Yes, your custo;ers will be able to see as a single product the variable product and their variations like this :
variable product displayed as a single product
If you define the setting as ***No,*** it will display variations as separate product and hide the main variable product.
# How to display product descriptions in my Bundle page ? ( PRO )
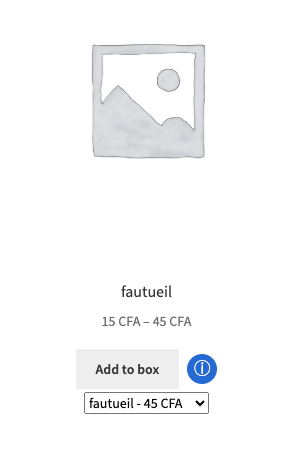
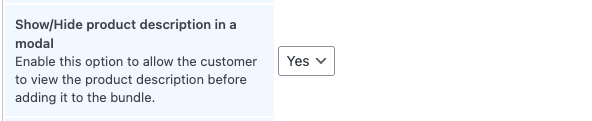
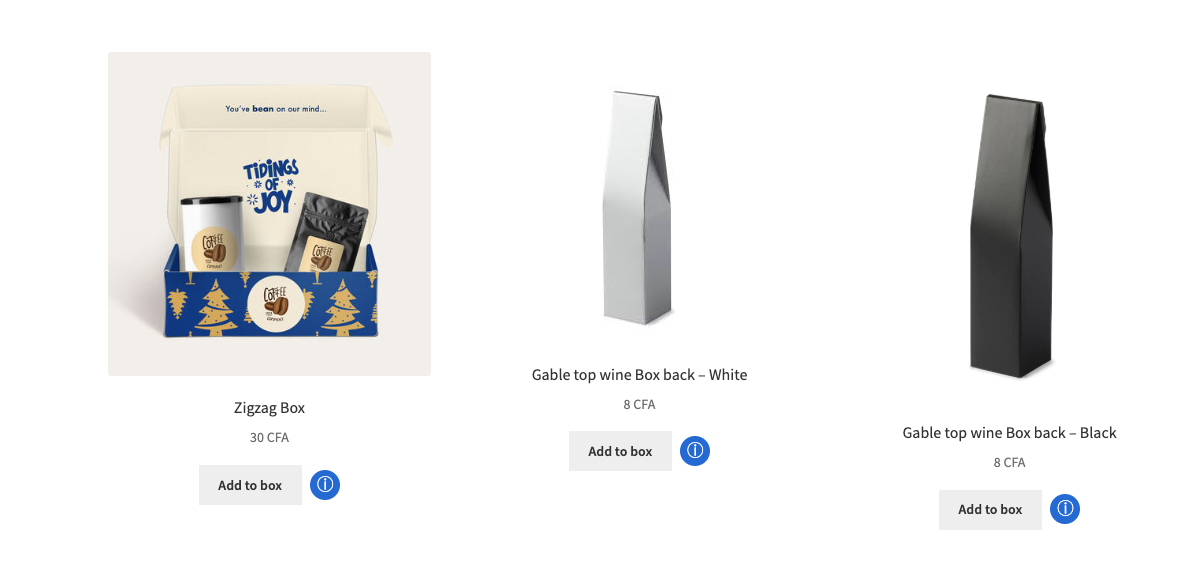
On the bundle creation page, there is a setting allowing to display a icon where customers can click on and display product informations into a modal.
If this option is set to ***Yes***, on the bundle page your page will look this :
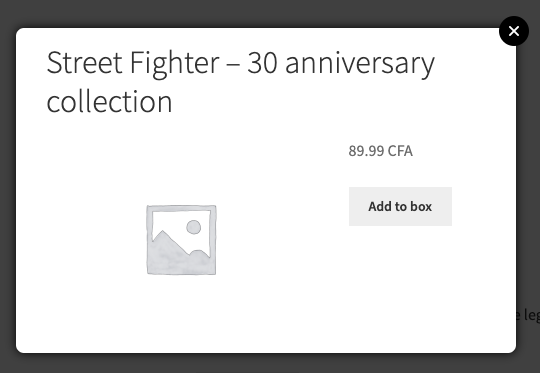
The modal displaying informations regarding a product in the bundle will look like this :
# Addons
Coming soon discounts add-on.
# Hooks for developers
Find below instructions for extend easily the plugin Doko Bundle Builder for WooCommerce :
{% content-ref url="/pages/6aFpSDgqeLm3UPmCJGPN" %}
[Public Hooks](/wordpress-plugins/doko-bundle-builder-the-ultimate-dynamic-bundle-builder-for-woocommerce/hooks-for-developers/public-hooks)
{% endcontent-ref %}
# Public Hooks
Below are the filters you may need to customise the look, feel or content of the Bundle Builder page in the Doko Bundle Builder plugin for WooCommerce.
**Actions :**
NA
**Filters :**
* ***doko\_display\_variations\_as\_many :*** \
This filter allows you to decide whether variations of products on the bundle page should be displayed as a single product or multiple products.
* ***doko\_skip\_product\_in\_shortcode\_loop :*** \
This filter allows you to decide whether a specific product in the bundle shouldn't be displayed.
* ***hs\_doko\_btn\_add\_to\_box\_link :*** \
This filter allows you to customise the "Add to Box" button displayed in the various bundle steps.
* ***doko\_get\_total\_price :*** \
This filter allows you to change the bundle total price and include custom fees after customers has added to the cart their products.
* ***doko\_add\_box\_contents :*** \
This filter allows you to add a custom product with a custom price to the bundle present in the WooCommerce cart and checkout.
* **doko\_cart\_contents\_element :** \
This filter allows you to include custom information before the bundle is added to the cart item object. Whether you want to add a custom product or another option to the basket, use this.
* ***doko\_js\_data\_boxpage :*** \
This filter allows you to add a custom variable or secret word to the bundle page. To use it, just get the value of your custom variable from ***doko\_object***.
# FAQ
# What should I do if adding a bundle to cart causes an infinite loading ?
If you are experiencing infinite loading after clicking "Next" on the last step, and you notice the loader spinning indefinitely, here are some solutions to resolve the issue:
1. **Check Product Purchasability**: Ensure that the product is purchasable. In WooCommerce, a purchasable product must have a price (ranging from 0 to 1,000,000 or more).
2. **Adjust Product Visibility**: If you want your product to be available only on the bundle page, change its visibility to "hidden." This means it will only be accessible to a limited number of customers. The plugin will still be able to find the product when linked, allowing customers to purchase it.
# How to translate text from English to other languages in WordPress/WooCommerce ?
In order to translate buttons, text section into the builder, we need an additional plugin named [Loco Translate](https://wordpress.org/plugins/loco-translate) .
You may need to install it and activate it in order to handle the translation of those elements.
Once installed, go to the section named Loco Translate and in the submenu click on Plugins :
loco translate section in dashboard
You will be redirected to a page listing all the plugins installed on your store and select the DokoBuilder plugin link.
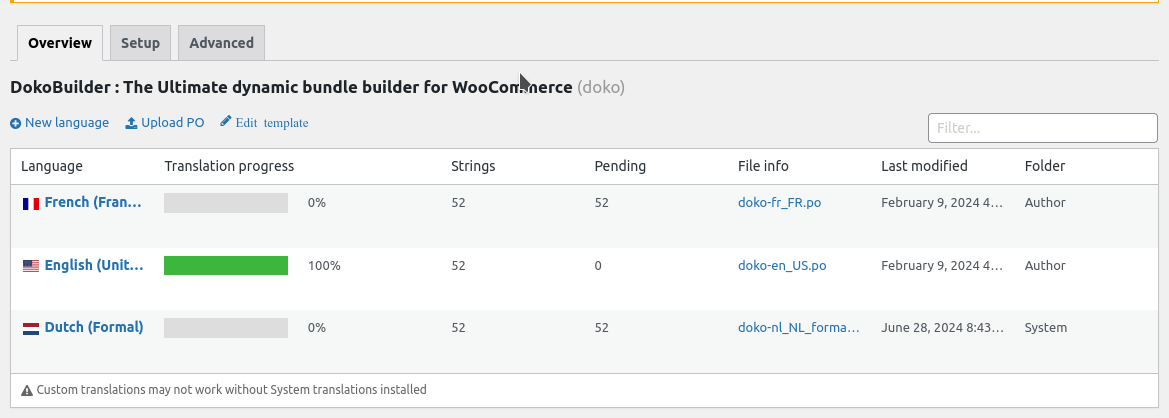
Once selected you will be redirected on a new page, on this page there will be 2 ( two ) sections giving you the ability to edit the translation, we will focus on the first section :
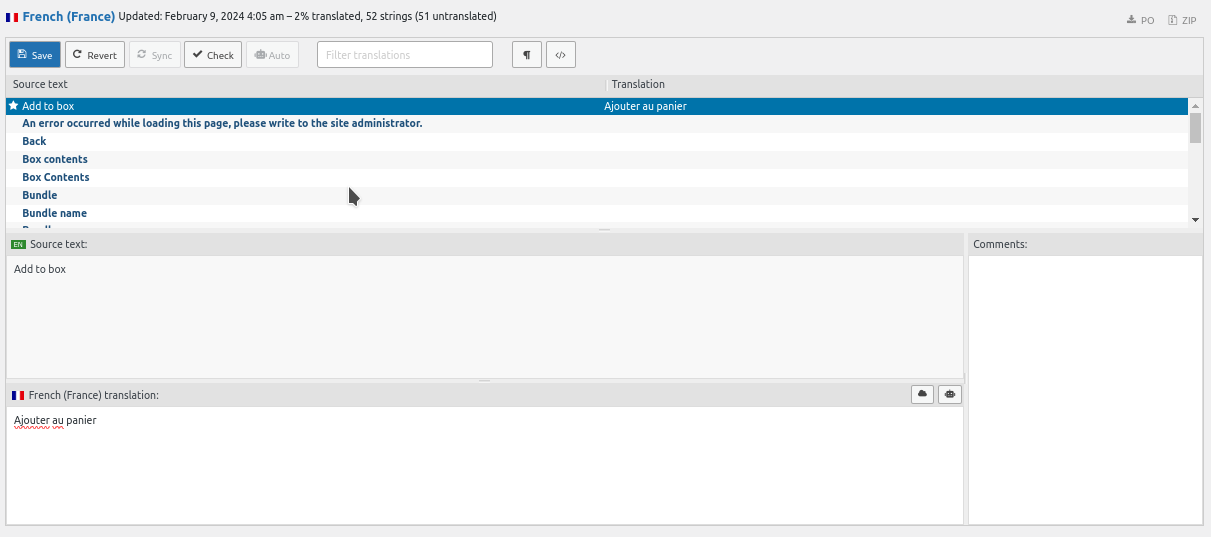
Before starting the translation, there is a need to make sure the source translation is updated, to do so click `Edit template` . On the edit template page, you will see a list of translatable words, to ensure the list is updated click on the `Sync` button and then save it.
After saving the template with the updated words, go back to the previous page, add a new language, then click on the new language added to edit it.\
On the page of the language words edition, select or search the word you would like to translate then on the subsection below add your translated word and save it.
By following the steps mentionned above, on your builder your page will display the text in your store language hopefully.\
\
If you have some additional questions, feel free to contact us on our website live chat here :
# Add to box button isn't showing on my WooCommerce store
When using a WooCommerce theme integrating a different add to cart button on your bundle builder page, you may encounter cases where the button is not showing or may need some additional steps in order to make it work.
This may confuse your customer when using your builder page and increase your page bounce rate.
In this case we implemented a new option in the bundle page allowing you to add a additional button so your customer won't get lost on your page.
enable/disable add to box button below the product card
# How do I paginate a bundle step page with many products in it?
Is your bundle step pages showing too many products by default, if so you may already be considering paginating the results so customers aren't overwhelmed by too many.
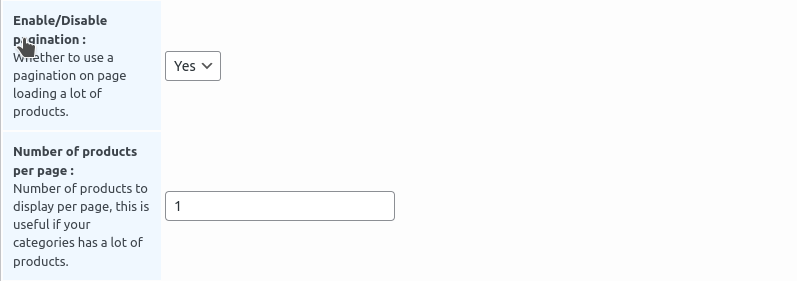
When adding a new screen for the bundle, there is a new option that gives you the ability to enable pagination, also you can define the number of products per page to be displayed.